System Fonts in CSS

About three years ago, I wrote a piece on how to get system fonts in CSS. The San Francisco fonts had just been released and getting them onto a web page wasn’t obvious or easy. A recent tweet reminded me that I needed to update this information.

In my original post, I proposed the idea of a generic system font:

The “system” generic family name doesn’t currently exist, but I’d encourage browser manufacturers to adopt this technique.

Apple agreed and made a proposal on the CSS mailing list. Over the next few months that proposal evolved from being called “system” to “system-ui”. (Once upon a time, Windows used a font called “System” that could have caused a conflict.)

At the end of the day the CSS Font Module was updated and there was an official way to render text just like the operating system.

As every web developer knows, getting a feature into the spec is one thing and getting it into the browser is quite another. Luckily the adoption of system-ui has been quick. Both Chrome and Safari support it fully on a wide variety of platforms. Only Mozilla and Windows are lagging behind.

In many cases, you’ll also have to take backward compatibility into account — not every visitor has the latest & greatest browser. This CSS should cover all the bases:

font-family: system-ui, -apple-system, BlinkMacSystemFont, "Segoe UI",
    "Roboto", "Oxygen", "Ubuntu", "Cantarell", "Fira Sans",
    "Droid Sans", "Helvetica Neue", sans-serif;

(For more information on what those font names mean, see Marcin Wichary’s article in Smashing Magazine.)

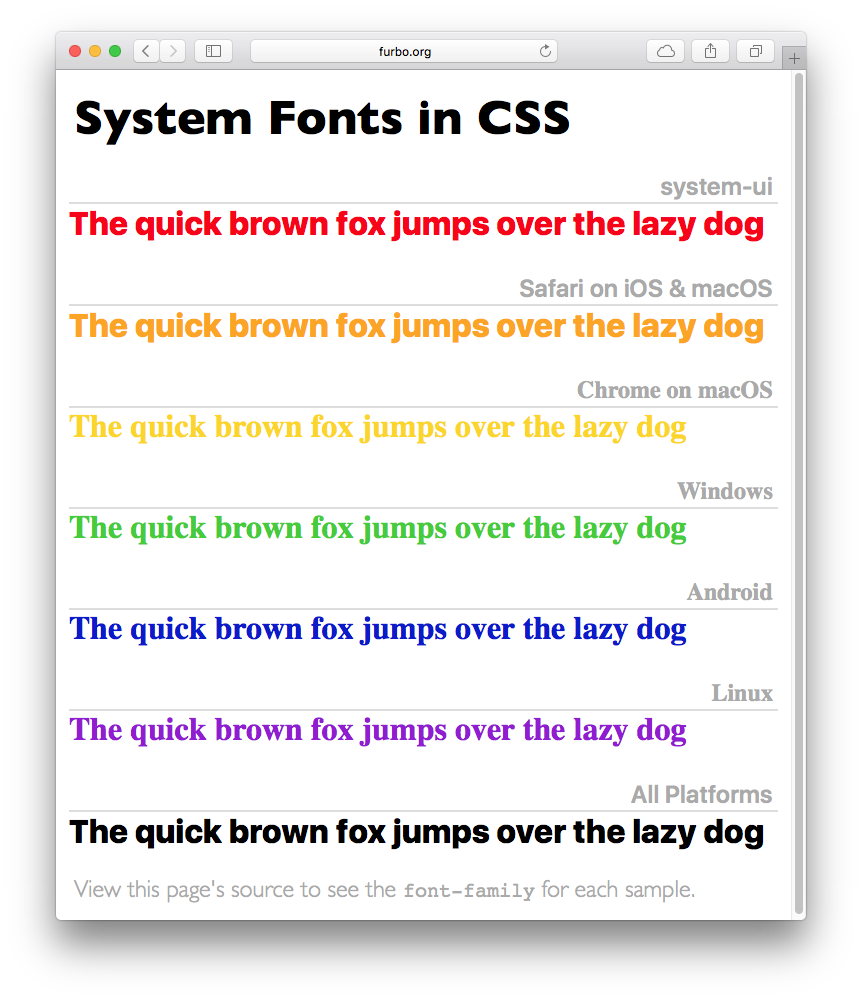
If you’d like to see how this new generic font-family works, here’s a simple page that can be used to test any platform.

This whole process has been fascinating for me to watch. What started as a simple idea ended up being discussed and implemented by dozens of talented engineers. The result is a web that’s better and easier for a lot of folks.

Updated June 30th, 2020: Apple has added additional CSS classes for different types of user interfaces (starts at 14:25). The new font families, ui-sans-serif, ui-serif, ui-monospace, and ui-rounded allow you to get a specific faces of the system fonts (both in San Francisco and New York). These new families were introduced in Safari 13.1. For more information, check out the details of UI typography at WWDC.

How Not to Do Accessibility

I’m 57 years old and my eyesight is getting worse every year. As a result, I have a newfound appreciation for the accessibility features that Apple builds into its products: they’re a lifeline for people who have problems worse than mine.

With such a unique and concerted effort towards accessibility, it’s surprising to see Apple ship a major OS release with a glaring usability issue. Yet that’s what we have in watchOS 4 when Bold Text is enabled.

I originally started using Bold Text at the suggestion of a friend and purely for aesthetic reasons. But as I used this feature, I found it also helped me read the information on my watch. It became an essential part of my user experience.

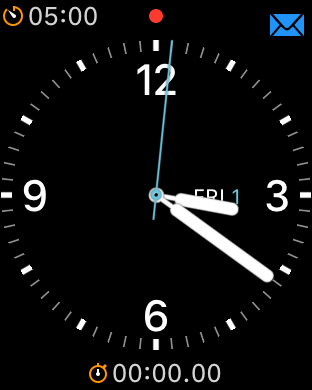
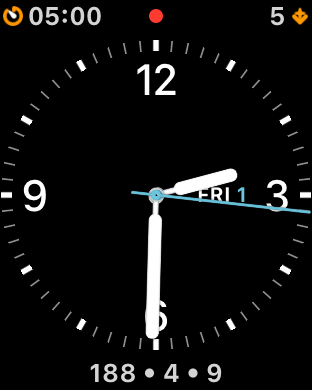
If you’re one of the lucky people who’s not using Bold Text on watchOS 4, you’re used to seeing clear and crisp icons for complications:

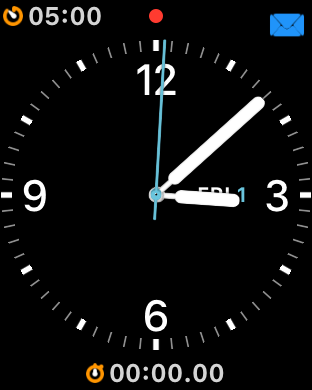
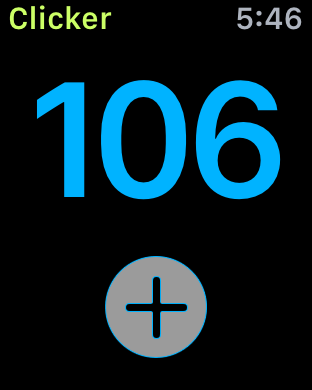
On the other hand, if you’re using Bold Text to help with legibility, you’ll find that the complication icons are fuzzy and sometimes impossible to distinguish:

What’s particularly concerning about this issue is the imprecise rendering has been around since I first reported it in watchOS 2.2 over two years ago!

(The gray part of the image above is a template for what should be rendered, the blue part is the what’s drawn on screen.)

It’s annoying when your assets aren’t displayed correctly, but the fringing artifacts in Clicker don’t affect its accessibility.

But now this problem has worked its way onto the most important part of my Apple Watch and makes it hard for me to tell what’s on its face. It’s time to either fix this damn bug or rename the setting Bold Text and Complications That Look Like Ass.

A New Way to Work

Up until the middle of last year, my iPad spent most of its time next to my comfy chair. I’d bring it into the office whenever I needed to test an app on the device, but for the most part it stayed in our living room for reading and browsing.

What changed? I added this to the home screen on my iPad Pro:

Linea Icon

Gedeon Maheux and Troy Gaul worked on Linea for over a year. What started as an internal tool for our artists, became something that has fundamentally changed the way I do development work.

A simple start

I’ve been coding professionally for over 40 years and have always kept a notebook near my desk. It’s an essential tool that lets me capture thoughts and ideas in a way that lists on a computer cannot.

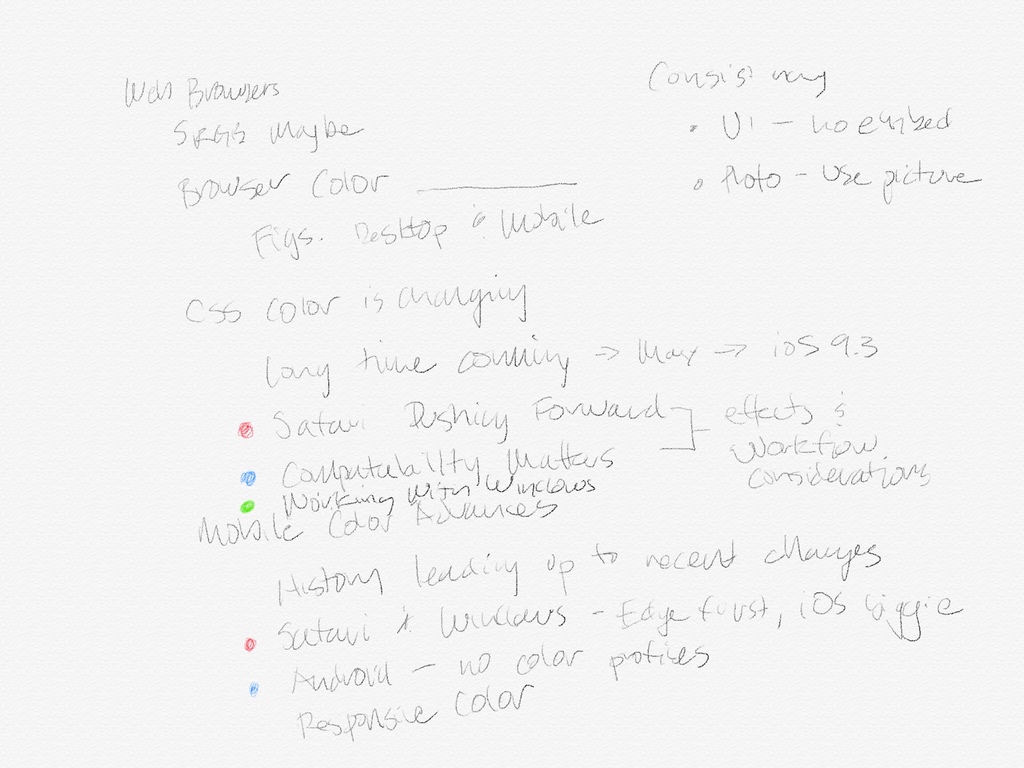
As I started beta testing Linea, my trusty paper got used less and less. My first work with the app was doing a rough outline for a chapter in my book on color management:

Book Outline

There’s nothing here that you couldn’t have done in the standard Notes app. It took me awhile to realize that Linea has a superpower you don’t get with the built-in app…

Discovering layers for ideas

To be honest, I didn’t use my Apple Pencil much until Linea came around. The Notes app didn’t do anything I couldn’t do on paper, and drawing apps were overkill for my needs.

This all changed when I discovered the power of simple layers for managing ideas. A few pictures are worth a thousand words, so let’s go through the process with a recent example: the testimonials section of Linea’s website.

In our line of work, we often get a design with no guidance on how to construct it. Here’s what the original design comp looked like:

testimonial-comp

It’s our job to figure out how to make these designs look and work right. And Linea is a powerful tool for that task.

Start by breaking it down

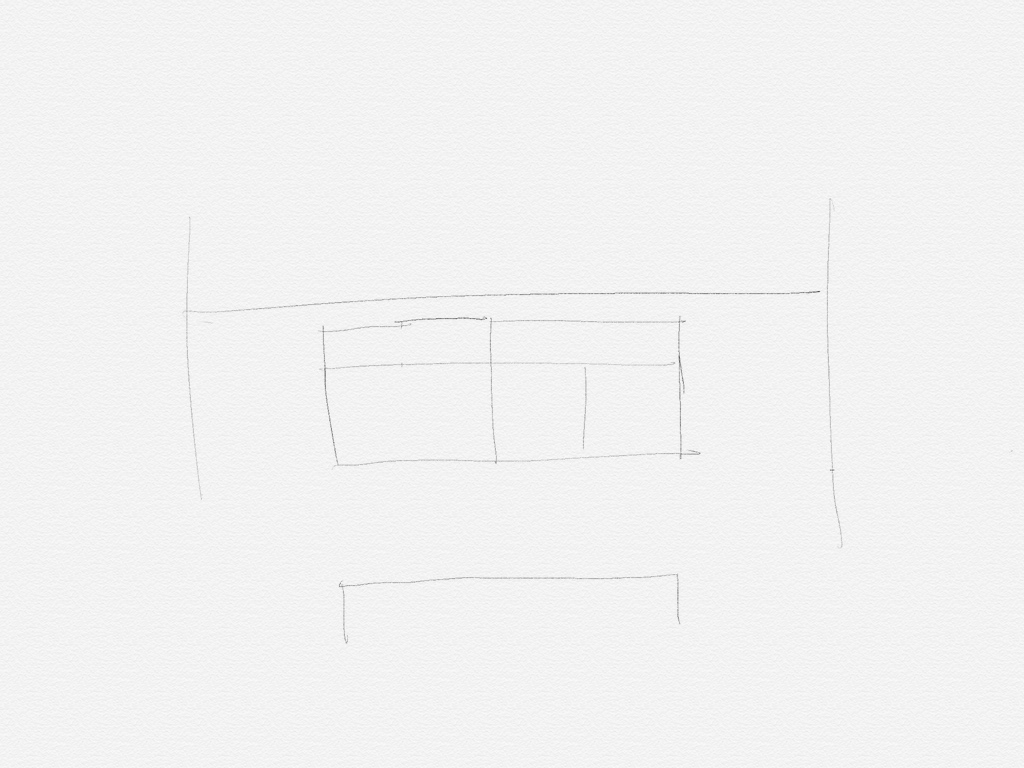
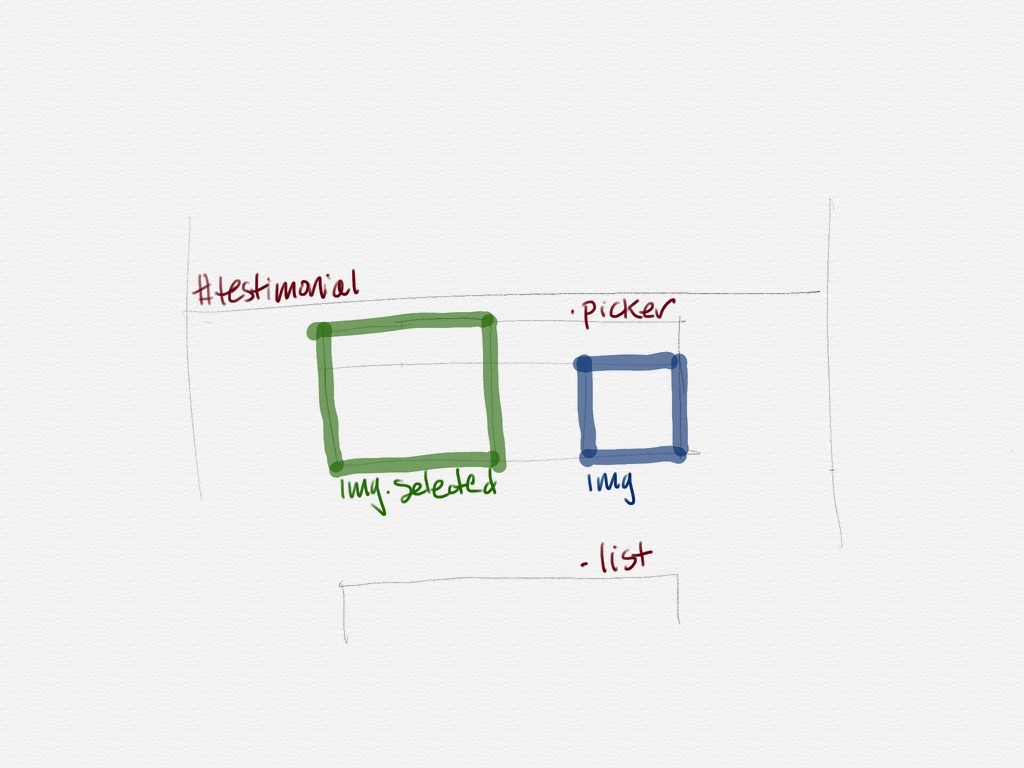
The first step is to break the design into pieces. I did a rough sketch of what I wanted on Linea’s bottom-most layer:

Testimonial Outline

So far, that’s pretty underwhelming. What’s the big deal?

Well, we’re about to encounter one of the three hardest things in computer science: cache invalidation and naming things.

Another layer for names

This is where Linea really starts to shine. Because it’s a hard problem, your first naming choices are rarely the best. If you’re like me, it usually takes a few tries to get the right ones. When you use a separate layer for your names, they’re super easy to change without wiping out the lines of the underlying outline:

Testimonial Naming

Because selecting colors in Linea is so easy, I like to highlight important names. While debugging the page, the two states of the img elements had a matching CSS outline.

It’s also when Linea starts to feel like a miniature whiteboard on your desk. The Touch Eraser is one of those things that is so natural that you use it without breaking your train of thought.

A notes layer above all

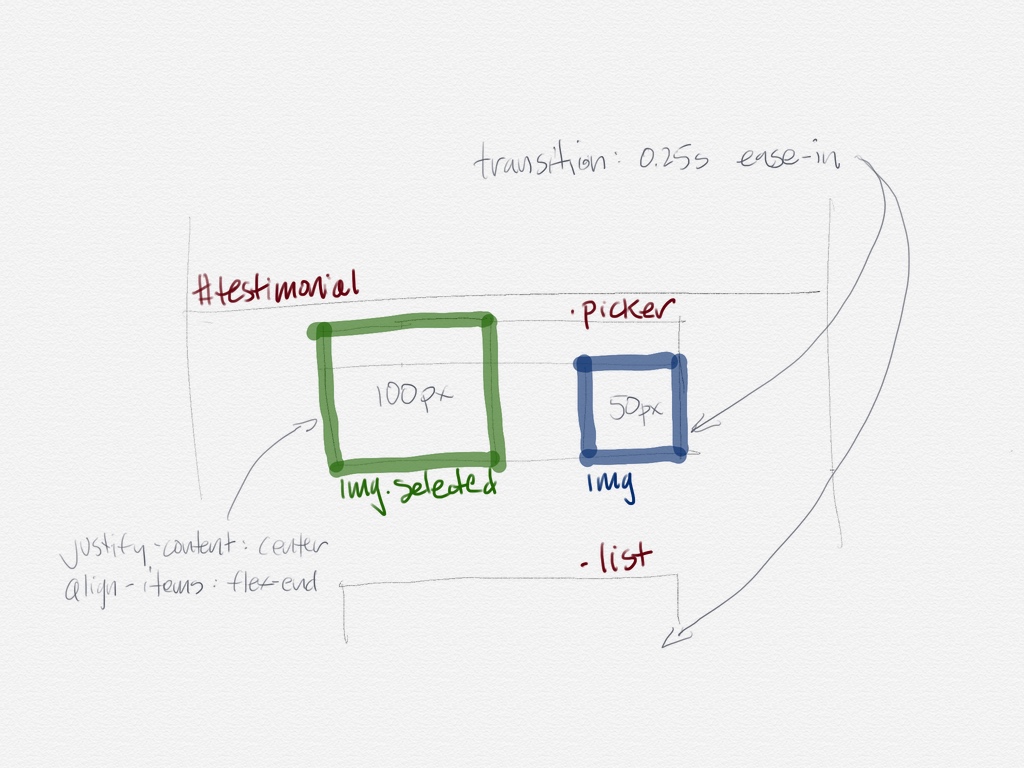
After getting the names you want, it’s time to start building! This is when I create another layer for things I want to keep track of. Again, you can add or remove notes without destroying the work on the other layers.

Testimonial Notes

My two favorite things in CSS are animations and Flexbox layout. And as much as I love them, you’ll see above that I can never remember the names of the timing functions or container properties.

(If you’re a web developer, take a look at the #testimonials source code on the Linea website: the images in the .picker Flexbox animate just by changing the CSS class on the <img> elements. Simple and elegant.)

Helping us stay organized

I also have a bad habit of keeping my drawings around forever — a lot of thought went onto the page and it’s hard to it throw away. Linea’s project management makes it easy to keep track of the old work and keep my desk clean.

It was a pleasure to learn that other developers are seeing the same benefits that I have. My friend Gus Mueller has this to say:

“Linea has been my go-to app for sketching out ideas and solving visual programming problems since the day I started using it. It’s now an indispensable tool for my work.”

My iPad Pro is still a great device for reading in a comfy chair, but now it makes a daily journey to my office. If you’re a professional developer, I bet Linea will become a fixture on your desk, too.

I invite you to take a look at the product website to learn more.

Making Sense of Color Management

Making Sense of Color Management Book Cover

After over two years of work, my book on color management is now available for purchase. People I know and respect are saying some really nice things about my writing. It makes me happy when doing hard things pays off.

Previously, I’ve written about how displays are changing and how color affects the things we build for these devices. Whether you build on the web, or with native apps, your work in the coming years will be affected. You can learn more about the book at the Iconfactory.

But don’t just take my word for it. Here’s what Mike Krieger, Cofounder and CTO at Instagram, has to say about the book:

For years, engineers and designers have mostly stumbled through color management, understanding it ‘just enough’ to ship an asset to the web or an app. As devices move to wide color, a deeper and more practical understanding is vital, and Craig’s book provides exactly that. In fact, I’ve put his advice to use for Instagram.

As a developer, you might be interested in taking a look behind the curtains at the book’s mini-site. You’ll find additional articles, new markup for the web, and sample code for both iOS and macOS. The book provides essential background for these examples, but it will give you a taste of what you’ll be learning.

I also have some more advanced code examples for iOS in the works. If you work with raw pixels in bitmaps, process photos with Core Image, or do analysis with vImage, this will be right up your alley, so stay tuned!

Sticker Accessibility

The popularity of Stickers was no surprise to us. What did surprise us was that these graphical elements are a hit with customers who have vision difficulties.

In retrospect, it makes sense. You want to let friends know that poo is hitting the fan even if you can’t see well. As always, Apple has thought about making their products accessible from day one, and the new features in Messages are no exception.

But it doesn’t work like you’d expect for the default apps created by Xcode. Take Parakeet’s excellent Snacks collection as an example. What would you expect to hear VoiceOver say with this configuration?

Bacon

Congratulations if you said “Bacon P-N-G Accessibility Label”. Technically, that’s the “same” as the Bacon.png file that was dragged into the Asset catalog, but it’s not what you or your customer expects. When you add “Bacon” in the Accessibility field as well, it’s read correctly and everyone wins. As you know, you can’t have too much bacon.

As for our own Sticker packs, we implemented custom view controllers and don’t suffer from this particular problem. We have identified some other small accessibility issues throughout our work and will be issuing updates soon. Parakeet will also be updating their release with improved labels.

If you’ve released Stickers for iMessage without Accessibility labels, we suggest that you do the same.